It is extremely important for the customer to fit the bottom Sealing Plate and/or EPG Kit.
Failure to do so will invalidate your warranty and compromise the seal (IP/NEMA) of the unit.
The below instructions are based on our 17″ Industrial Client Computer, instructions for other sized Industrial PCs may differ slightly in terms of the number of screws, grommets, etc, however the procedure is exactly the same.
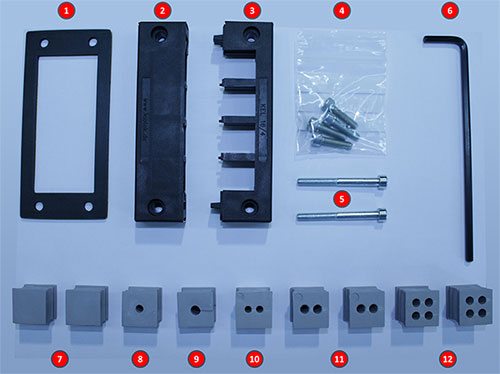
The EPG Kit will consist of:
1 = Entry Plate Gasket
2 = Entry Plate Top Half
3 = Entry Plate Bottom Half
4 = 4-off M5 x 20mm Socket Head Cap Screw
5 = 2-off M5 x 50mm Socket Head Cap Screw
6 = 4mm Allen Key
7 = 2-off Blank Grommets
8 = 1-off 5-6mm Grommet
9 = 1-off 6-7mm Grommet
10 = 1-off 2x4mm Grommet
11 = 2-off 2x5mm Grommet
12 = 2-off 4x5mm Grommet
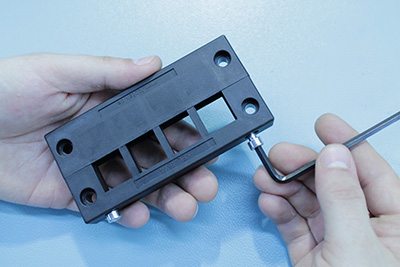
You may have to dismantle the Entry Plate first, to do so follow the instructions below.
Using the 4mm Allen Key (6), unscrew the long M5x50mm Socket Head Cap Screws (5) at the bottom of the Entry Plate like so:
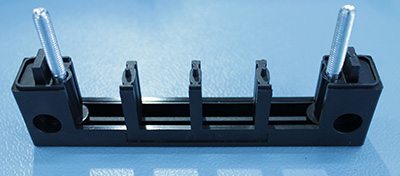
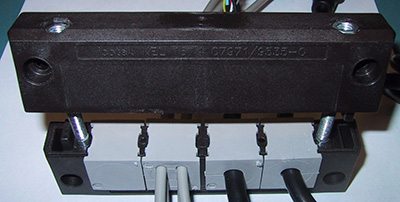
To make things easier, leave the long M5x50mm Socket Head Cap Screws (5) in the Entry Plate Bottom Half (3) and rest on the worktop like so:
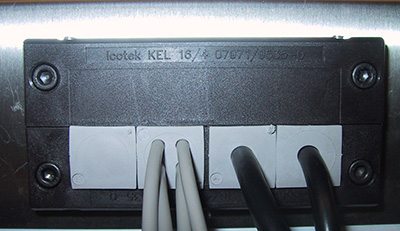
Then pre measure the internal cable to the gland, making sure to pick the correct diameter grommets for the cable(s) being put through.
Ensure the flat side of the gland is visible when fitted into the Entry Plate.
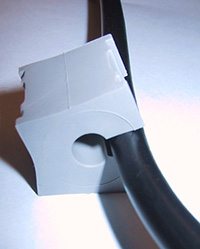

Repeat the above steps with the remaining cables, again ensuring that the flat side of the glands are visible when fitted into the Entry Plate.
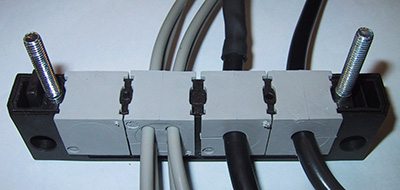
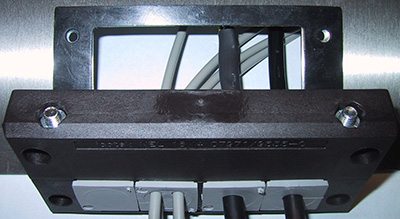
Now take the Entry Plate Top Half (2) and clamp it over the top of the glands like so:
Use the 4mm Allen Key (6) to tighten the Entry Plate together.
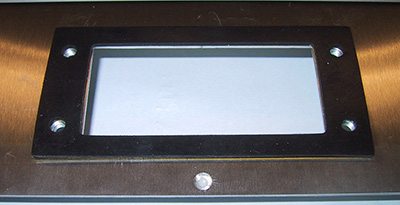
Remove the backing on the Entry Plate Gasket (1) and stick the Entry Plate Gasket around the aperture in the IP65 Back Plate like so:
Now feed the cables through the aperture in the IP65 Back Plate and plug them into the Industrial PC.
Make sure the cables run smoothly to the ports and avoid any kinks in the cables.
Finally fix the Entry Plate to the IP65 Back Plate using the 4-off M5x20mm Socket Head Cap Screws (4) and the 4mm Allen Key (6).
You have now finished fitting the EPG Kit, please now move onto the Sealing Plate fitting instructions below.
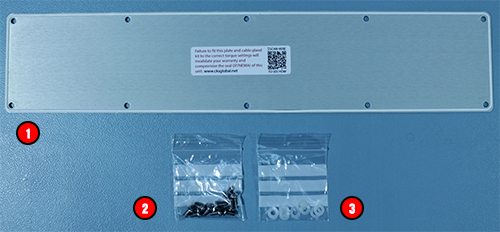
The Sealing Plate Kit will consit of~:
1 = Sealing Plate
2 = 10-off M4X8mm Hex Drive Screws
3 = 10-off M4 Nylon Washers
The sealing plate is fitted to a torque setting of 1.2 N.m (Newton Meters). Failure to fit the sealing plate using all screws and washers provided, at the torque setting of 1.2 N.m (Newton Meters), will invalidate your warranty and compromise the seal (IP/NEMA) of this unit.
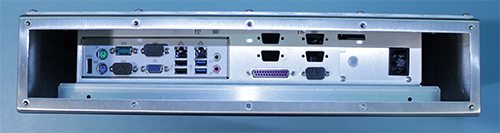
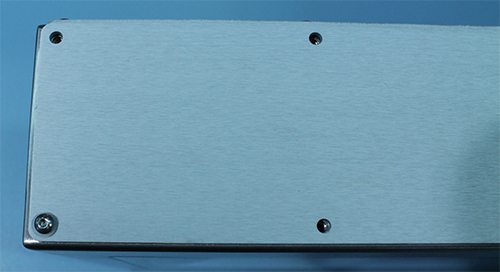
Before fitting the bottom Sealing Plate (1), your Industrial PC will look something like the below.
Simply take the Sealing Plate (1) and lay it with the white o-ring face down covering the bottom.
Take one M4x8mm Hex Drive Screw (2) and one M4 Nylon Washer (3):
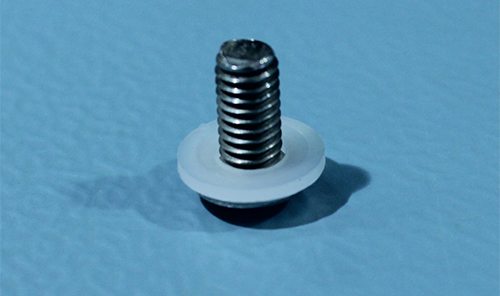
Place the Hex Drive Screw with the Nylon Washer into one of the corner holes of the Sealing Plate (1) like so:
Do the same for the rest of the holes in the Sealing Plate (1) and tighten all screws to a torque setting of 1.2 N.m (Newton Meters). You should then have something that looks like this:
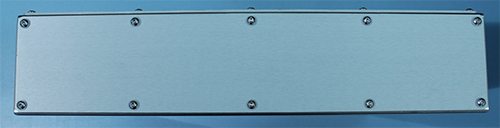
Once you have fitted all screws and washers to the Sealing Plate with a torque setting of 1.2 N.m (Newton Meters) you have finished fitting the Sealing Plate.